

 Hi! If you are just joining in, this blog is about about Art, crafts and having fun! We are making an organizer cover today, to put the organizer pages from Day 1 together to keep up with the month of art and crafts we will create.
I love making 'stuff'. I have always loved making things, taking a piece of fabric and making something nice to wear, some paint and a canvas and having something to hang on the wall, or baking a beautiful cake that tastes yummy. Every skill has a place of honor with me. Even recycling, and yes... I include that as a skill! You have to know what to keep and what to throw... and to me, that is a skill :)
Today's project is taking something leftover and creating something else with it. Specifically, the piece of cardstock that I used to catch drips from yesterday's project, and making a cover out of it. At least it will be a big component of the cover. I am using a different technique than yesterday, instead of using one single pour, I am using the page itself to lay down the paint. So, if you liked the results from yesterday, you may want to skip down, if you are just joining in, this is everything you need to know about creating the painting we will use for the cover.
Let's get started.
 The Shopping list is under the tab, Shopping List... pretty good, right? but if you created a painting already, you have just about what you need...
 I am recycling a 3 ring binder, if you choose to buy one, or buy a journal or some type of 'keeper', make sure you have pages that will fit it, there are many, many great sites to find pages, or buy them from the stores, I also have organizer pages, progressively growing in number under the Tab "Planner Pages". They fit an ordinary 3 ring binder.

The supplies are a bit different today from what we used yesterday. I like to use tissue paper, printed napkins, newsprint(not printed of course), paint, glitter, sequins, acrylic or crystal gemstones, stencils, and anything else I can get my hands on!
 I found this textured thick cardstock that has been laser cut into shapes. I love using that, it can go on the color it is, this is a grey, or it can be painted, inked, powdered or chalked!
 Of course, we need to use some small containers to mix paint, paint- acrylic, inexpensive, PVA glue(white school glue) and water that can be dropped into the paint, I use a bottle with a nozzle that is small so I can drip the water.
 I know this sounds crazy, but from the Automotive section, I get mine at the dollar store, some automotive lubricant. It goes by other names, but by any name, it is what you need. Something to stir with, I use chop sticks or bamboo skewers, you can use popsicle sticks or even a toothpick, since we aren't mixing a large amount of paint.


 The ratio is one part paint to one part PVA glue. if the paint is thick, you will add a few drops more water to get it thinned to the consistency of thick cream. It pours off the stirring stick, but it still coats it. Mix well, but try not to get too many bubbles.
 I added the picture of the orange paint, since it was thicker, I wanted you to see that you can use thicker paint for this, just add the equal part of glue and a few drops of water, if it is still too thick, add a drop or two at a time until you get the right consistency.
  I checked to make sure the
 paint was going to drip enough, and I actually lifted the card to check to see if it would run... it did, so I poured a circle of the paint mixture. Next was the orange (it is actually 'nectarine'). Swirl it around, then add the next color, until you have used all the paint colors. I stuck with just 4 colors this time. I really planned on the 'tropical blue' as being the main color, but... as with the past trials, I loved how it turned out without pouring much paint off, or to the side, and it turned out to be more silver and black this time... which is great, it amazes me how excited I am even when it turns out vastly different than I planned!
 Tilt the cardstock from side to side, up and down to get the paint to flow across the surface. Since I had painted this before, and it was dry, the paint flowed pretty slowly. Had it been wet, the flow woud have been faster, but I really didn't want that.
 I'm telling you, I love the way the paint flows, the way it blends, bleeds, and absolutely changes from second to second while you are watching it! The colors on this are lovely, the silver just set off the whole piece. I'm glad I didn't use white after all.
 Place the piece onto something like waxed paper, plastic table cover, plastic wrap, I used some paper that has a nice plastic type coating that was left over from a roll of contact paper. I love that it doesn't stick to just about anything. When it is dry, you can just throw the other paper away, or like me, start another painting!

 I know, I am obsessed with the pouring, it just fascinates me! You can see that I added some acrylic rhinestones and a bit of glitter to the wet paint/glue mixture. The glue will hold the bits down, but I think it best not to go overboard on the extras. You want to have leeway to decorate more later.
 |
| cover the inside to hide previous pictures |
 |
| I didn't want to cut my painting, just folded it inside |

 The cover was bent, so I had to decide if it would be straight enough to use, I think it will straighten when I add the paper, and I can always weigh it down to help straighten.
This next part is strictly up to you, how much you add, how much you leave plain. I like to glue down news print the add bits of tissue paper, gluing it down with PVA glue. it doesn't take a lot, and I use a bit of water mixed with it to thin it down a bit, covering any printed area of the notebook. If you have a solid color, then you probably don't need to add anything else. But... you can add as much bling as you want.
 |
| use tissue paper to hide the edge of the painting. |
I used tissue paper to butt up against the painting, to cover the raw edge, but you could use a small cording, ribbon, or use a decorative paper to cover just the edge and fold it over, glue inside the cover.
 I liked the wrinkled look that the tissue gave, it can be smoothed, but I liked the wrinkles, they seemed to match the paint on the front cover, kind of pinched in places and smooth in others.
Inside, I stenciled a bit with the color "pumpkin" just to give a little interest. I didn't worry too much about finishing the bottom of the cover inside. I glued a piece of orange card stock in to create a pocket. Maybe I'll stencil with the "tropical blue" to finish it a bit.


I glued thick paper to the binding,using my fingernail to smooth it a bit, leaving an empty bit at the bottom, of

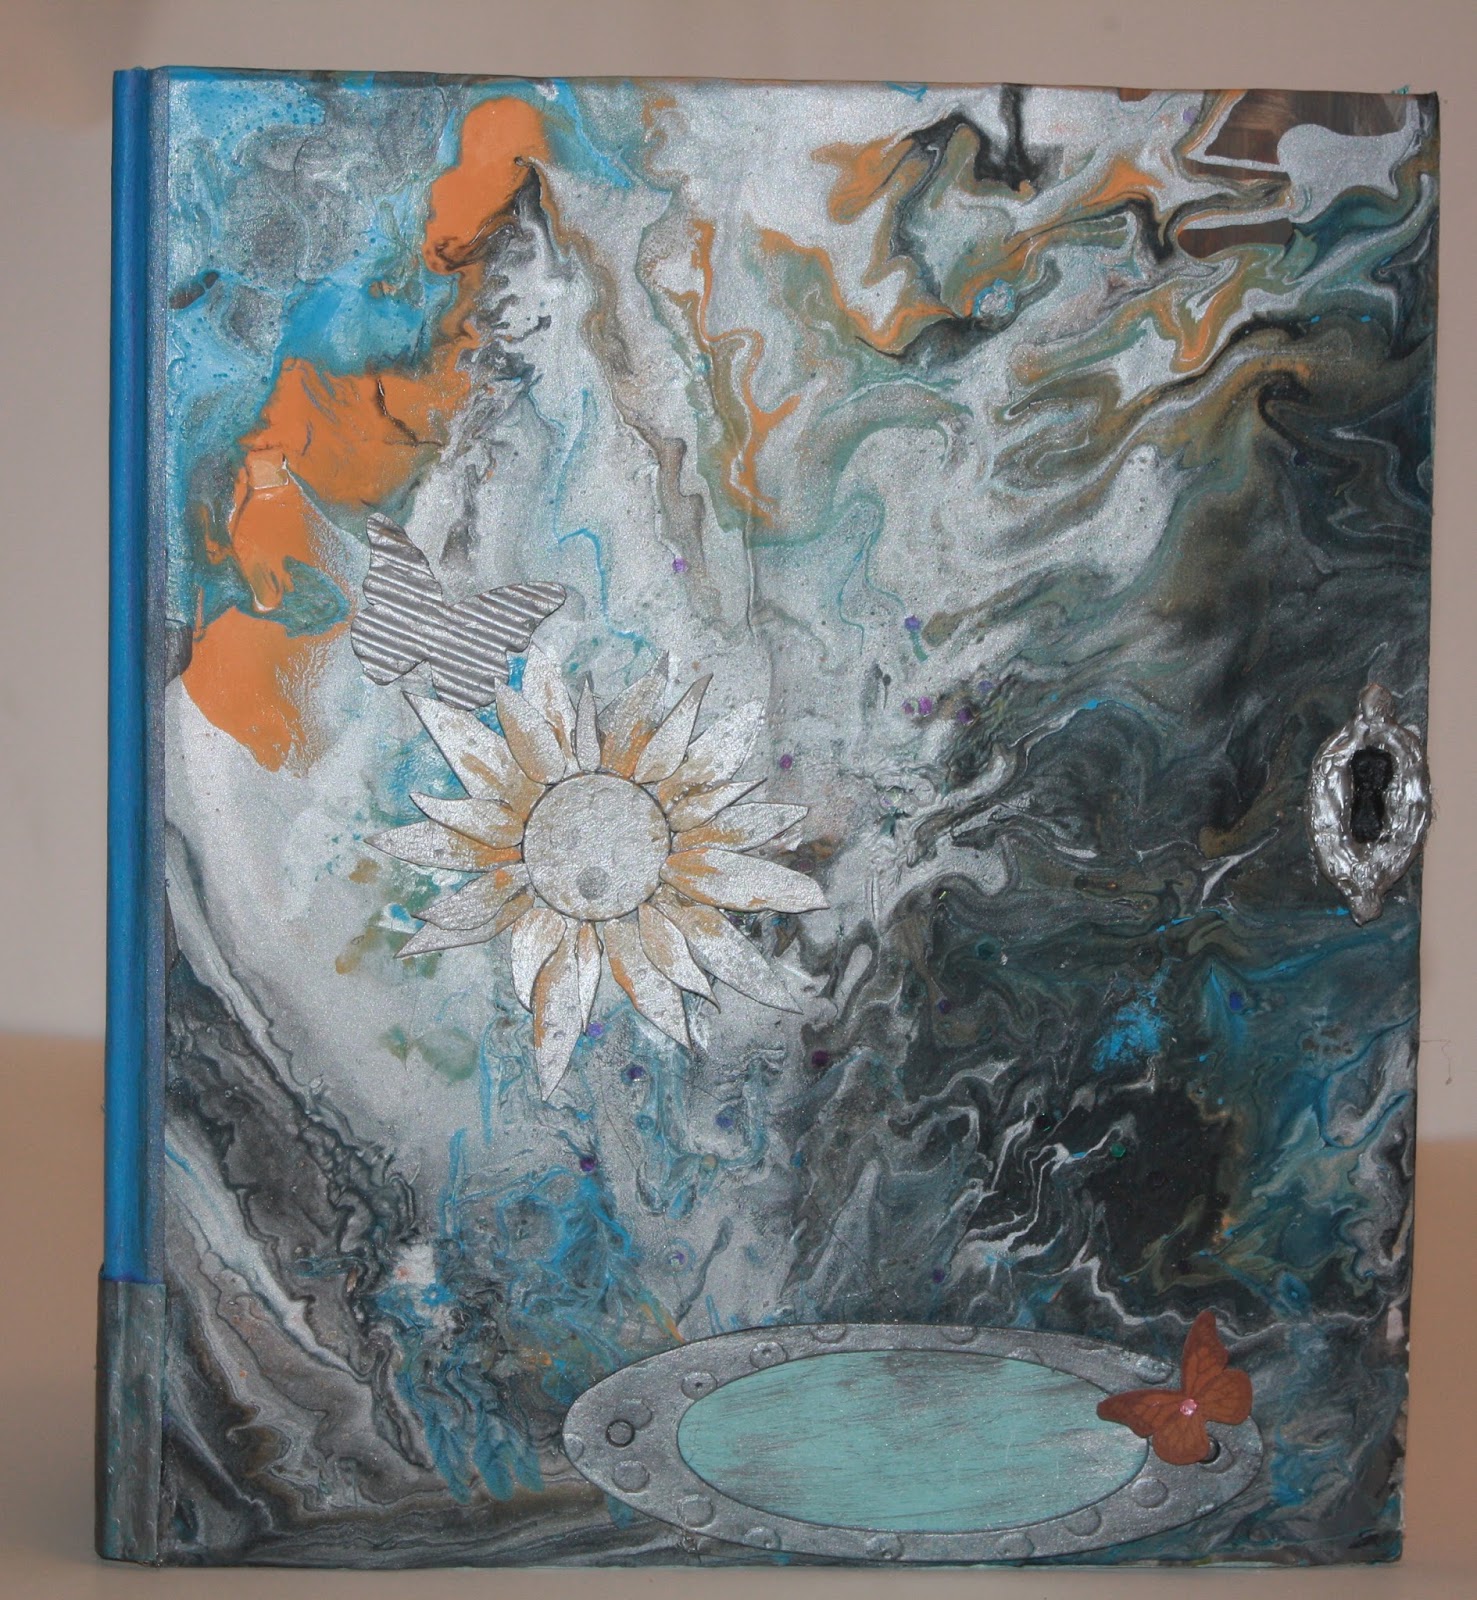
 course to add... acrylic rhinestones! I also glued a couple to look like maybe a futuristic lock? I really didn't like the look of them! So, I pried them off, since the silver was pretty overpowering, I thought about going for a more industrial look. Adding a small oval frame and a corrugated butterfly, then a flower, which is the thick card stock. Each petal is free form so each is different, then they were painted the same silver that was used for the cover, highlighted (or shaded if you will) with black on a dry brush. For the back cover, I used the same stencil as the inside cover, the same color, nectarine. It needs something else on the back,so it will get a another stencil (the same) with the Tropical Blue on a very dry brush so it will not overpower the cover.
  I have not added wording, since I really don't know what I want this to be for, I could use letters cut out with a 'Cricket' or die cut letters.
For my actual organizer, I do not have any wording on it, and I think I need to add something else to the front cover, but not quite sure yet. Any suggestions?
The Organizer for my pages is kind of dull, I thought I'd spruce it up a bit, but just can't find the right ... bits to put on it, though it will work, I want a bit more bling!

 |
| A bit Plain |
No comments:
Post a Comment